Add Vendors
Using the Lookup function
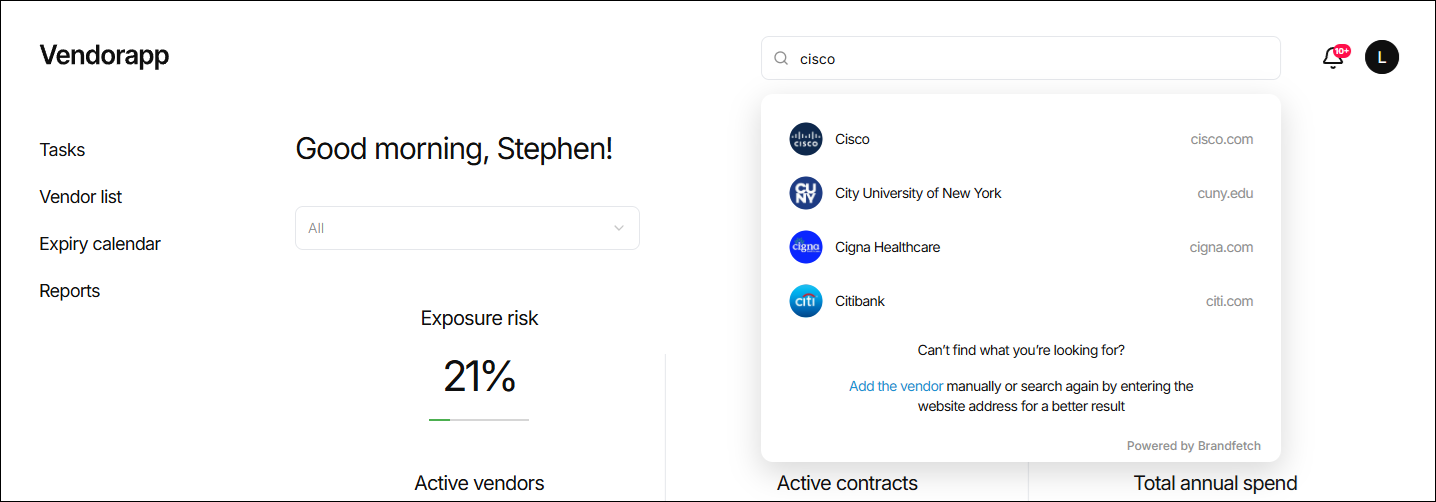
The lookup function is the only way to initiate adding a vendor in Vendorapp. It helps prevent duplicate entries, ensures data consistency, and connects to one of the largest vendor databases globally — with over 22 million records.
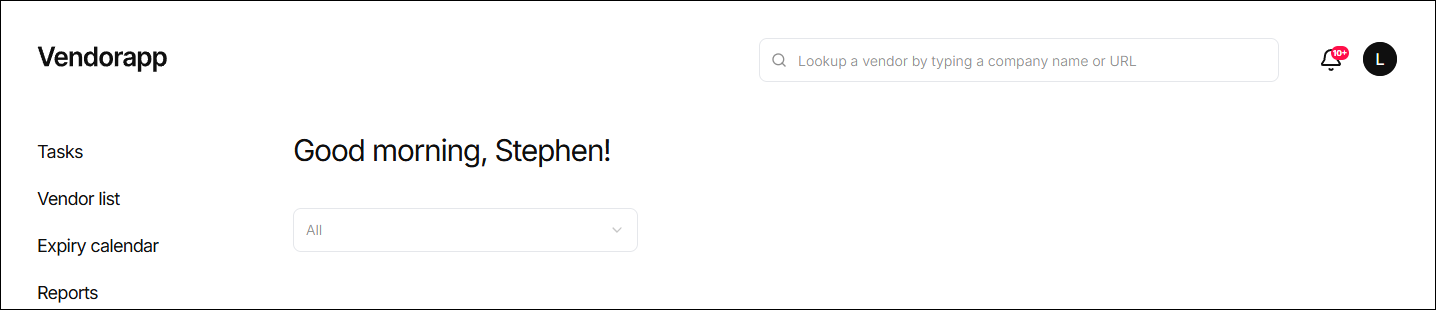
The lookup/search bar is accessible at the top of every page in Vendorapp (except within Vendorapp Docs). All users, regardless of role, can use it.
To begin, the user types the vendor's name or website into the search bar. As they type, results from the external vendor database appear in a dropdown.
Matching against internal database
Once the user selects a vendor from the dropdown, Vendorapp performs an internal database check:
- If the vendor already exists in your internal database, the user is taken directly to the Vendor View
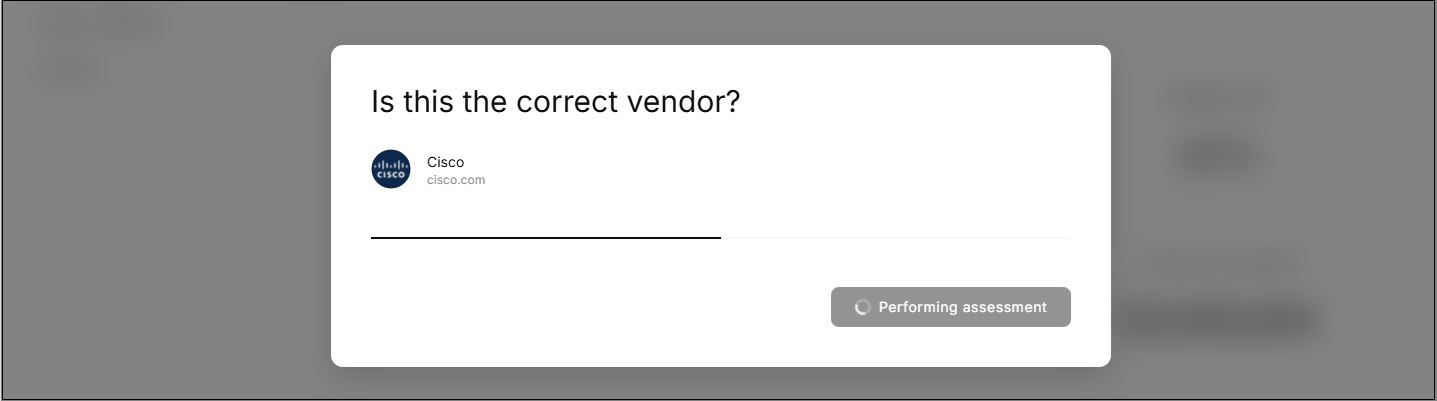
- If the vendor is not yet in use, a confirmation modal appears showing:
- Vendor name
- Website
- Company logo
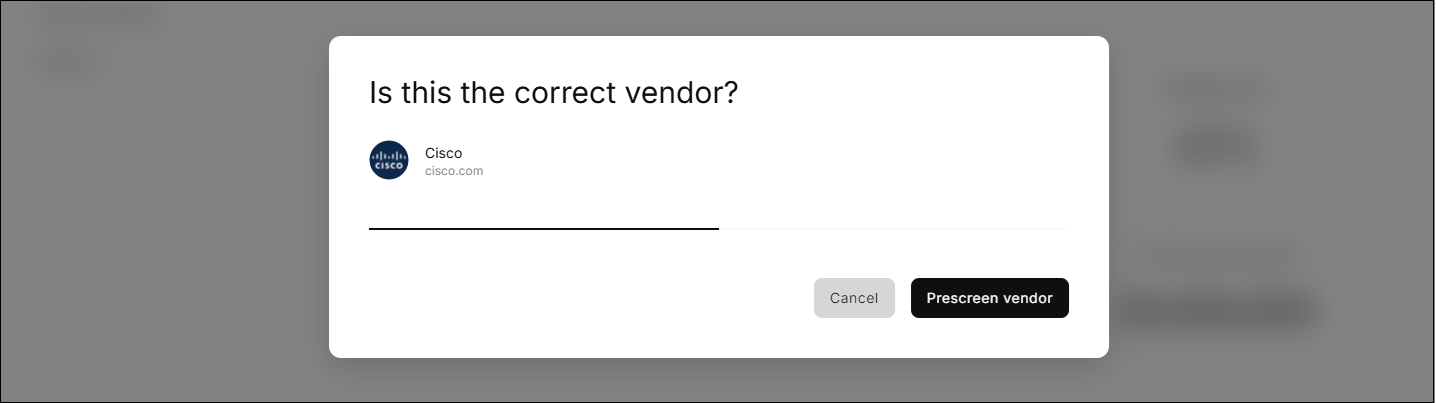
The user can then choose to run a pre-screening or cancel the process.
Manually Adding a Vendor
If the desired vendor does not appear in the lookup dropdown, the user may click "Add vendor manually."
This opens a modal requesting:
- Vendor name
- Vendor website
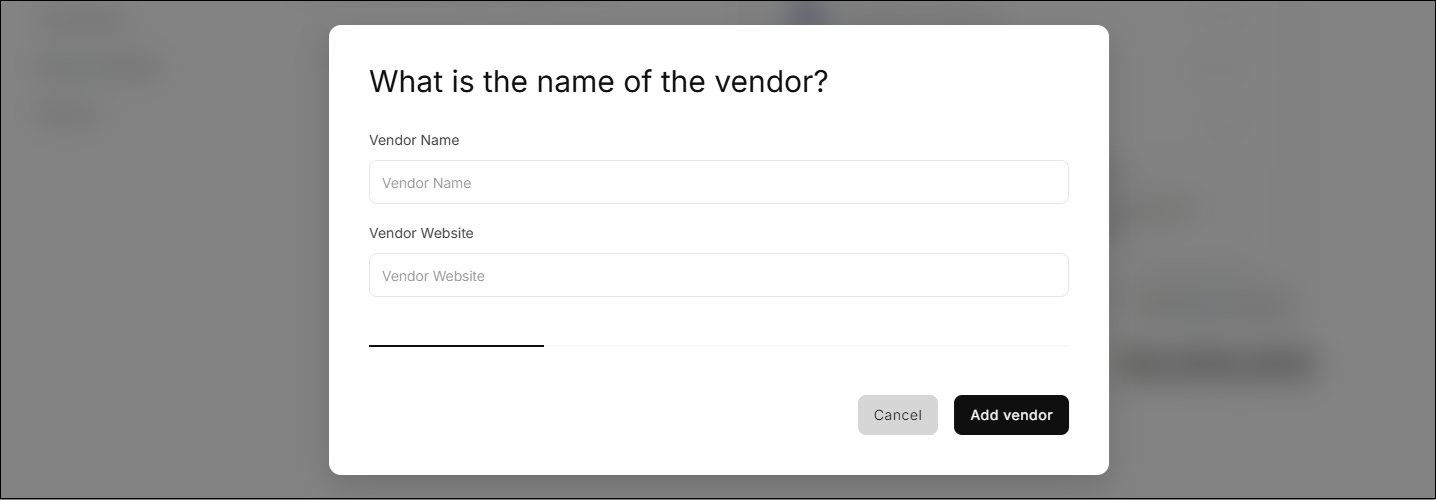
After submitting, a confirmation modal appears showing the entered details and an option to run a pre-screening.
Pre-screening vendors
Whether a vendor is found via lookup or added manually, the user must complete a pre-screening step before the vendor is added to the internal database.
Clicking "Prescreen Vendor" runs:
- Sanctions Screening – against global watchlists
- Exposure Risk Assessment – rated: Low / Medium / High
- ESG Risk Assessment – rated: Low / Medium / High
This takes only a few seconds. The results are displayed on screen.
From here, the user can:
- Click "Add Vendor" to continue
- Click "Cancel" to exit (vendor is not created)
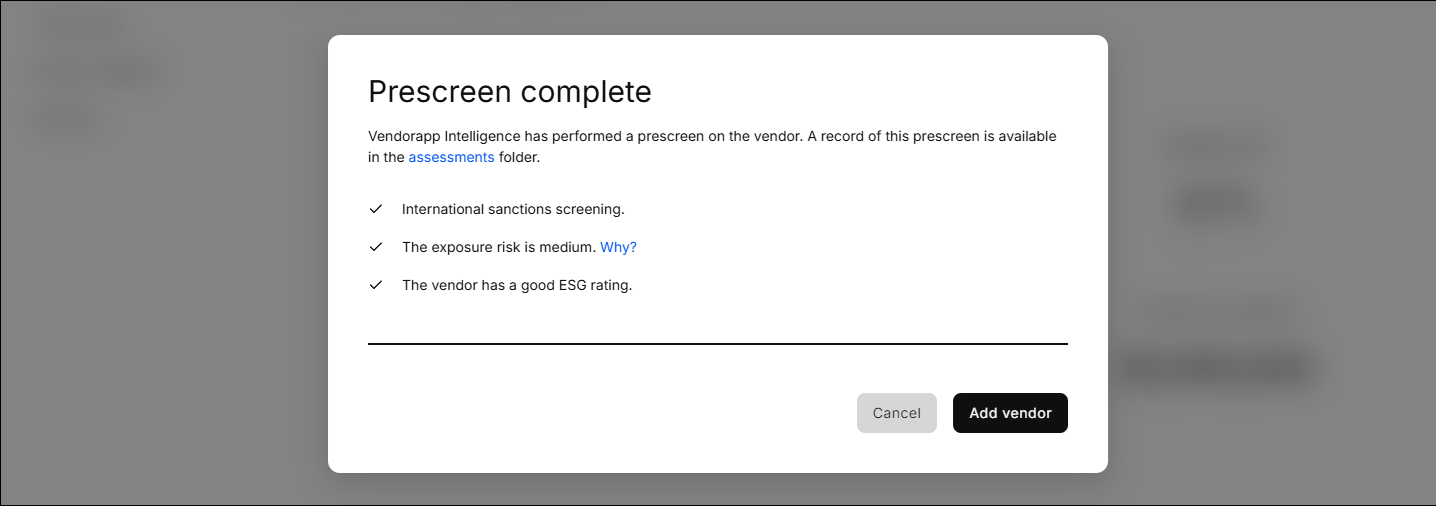
If No Sanctions Are Found:
- Clicking Add Vendor will add the vendor to the internal database as Active
- The user is redirected to the Vendor View
If Sanctions Are Found:
-
Clicking Add Vendor creates a task for an Agent to review
-
If the Agent approves, the vendor is added as Active
-
If rejected, the vendor is added as Blocked
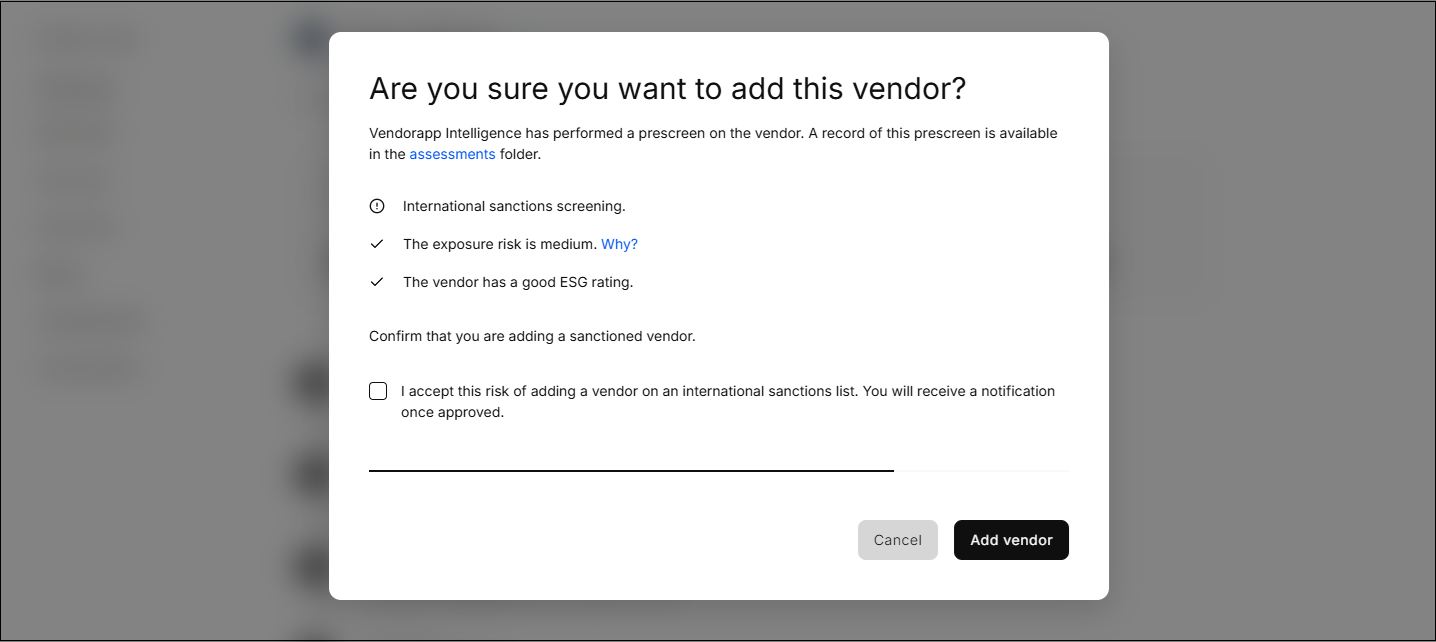
The Vendor View is only created and the vendor added to the internal database once the vendor has been approved or rejected for use.
Adding a blocked or disabled vendor
Blocked or disabled vendors already exist in the internal database and can be re-engaged via the lookup function.
Definitions:
- Blocked: The vendor was flagged during a sanctions screen and the Agent rejected its use.
- Disabled: The vendor was previously in use but has no active contracts for 60+ days.
Steps to re-engage:
- Search for the vendor in the lookup bar
- Select from the dropdown — the Vendor View will open
- Click "Re-engage" in the top-right of the screen
A modal will appear to confirm vendor details and run the pre-screening again. If the vendor is not on the sanctions list, it becomes Active again in the internal database. If sanctions are found a task will be raised for an agent to approve or reject the vendor for use.
Plan limits and vendor statuses
Each Vendorapp plan includes a cap on the number of active vendors allowed in the internal database:
- Basic: 15
- Startup: 150
- Advanced: 500
- Expert: Unlimited
If a user attempts to add a vendor beyond the limit, the app will show:
"Plan limit reached, upgrade plan."
Vendor statuses include:
- Active: Vendor is in use and associated with at least one active contract
- Disabled: Vendor has no active contracts for 60+ days (auto-disabled)
- Blocked: Vendor failed sanctions screening and was rejected by an Agent
Only vendors in the internal database have a Vendor View.