Add/Manage Contacts/Addresses
Who can view and manage contacts
Access to the Contacts & Addresses section within the Vendor View depends on user role and their relationship to the vendor:
-
Agents can view, add, edit, archive, and delete all contacts and addresses.
-
Contract Owners can manage contacts and addresses only if they have an active contract with the vendor.
-
Viewers can view contacts and addresses but cannot add, edit, archive, or delete.
If a contract owner loses all active contracts with the vendor, their ability to manage contacts and addresses is revoked. The "Add contact" and "Add address" buttons will appear greyed out as it would for those users who do not have access to manage contacts.
Contacts and address overview
The Contacts screen is divided into two sections:
-
Top Section: Contact list
-
Bottom Section: Address blocks
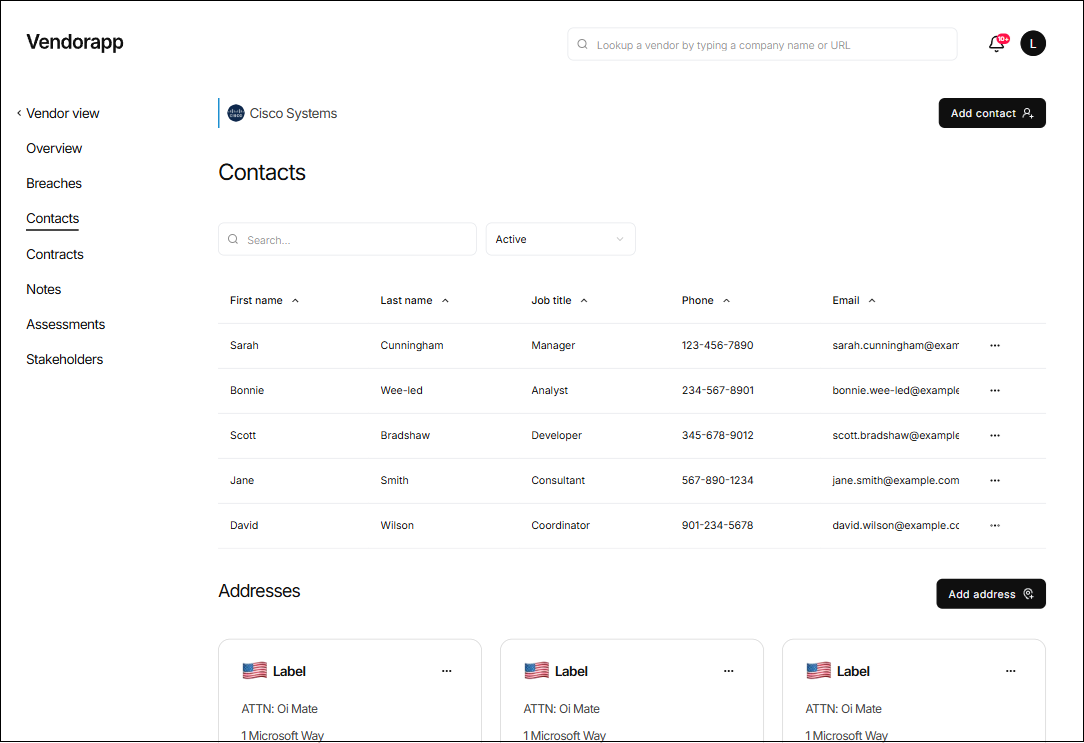
Each contact entry must include:
- First Name
- Last Name
- Job Title (or a "-" if not provided)
- Phone Number
- Email Address
- Options menu (...) for actions
Note: If a LinkedIn profile was added during the Add or Edit contact flow, the First name will be clickable to open the user's LinkedIn profile in a new browser window
Each address includes:
- Suite/Level/Office Number (optional)
- Street
- City / Town
- Zip Code
- Country
- Options menu (...) for actions
Both sections support filtering via a dropdown at the top-right of the screen:
Active, Archived, or All. Archived items are always displayed below active ones when "All" is selected.
Adding a contact
To add a contact:
- Go to the Vendor View for the selected vendor.
- Navigate to the Contacts tab.
- Click "Add contact" in the top-right (button will be greyed out for ineligible users).
A modal will appear requesting the following fields:
- First Name (required)
- Last Name (required)
- Email Address or Phone Number (at least one required)
- Job Title (optional)
- LinkedIn Profile (optional)
Once the required fields are entered, the Save button becomes active.
Editing, archiving, and deleting contacts
To edit a contact:
- Click the ... next to the contact's row
- Select Edit, make changes in the modal, and click Save
To archive a contact:
- Click ... > Archive. The contact will be moved to the Archived view
- When archived, phone and email fields are obscured for all users except Agents
To delete a contact:
- Click ... > Delete
- A modal will confirm that deletion is permanent and irreversible
- Confirm to remove the contact
If the user does not have permission, the ... menu will be greyed out and inactive.
Adding an address
To add an address:
- Scroll to the Addresses section (below the Contacts list).
- Click "Add address" (button will be greyed out if the user lacks permission).
The modal requires the following fields before the Save button becomes active:
- Street (required)
- City (required)
- Zip Code (required)
- Country (required)
- Suite/Level/Office (optional)
Saved addresses are displayed in card format below the contacts list.
Editing, archiving, and deleting addresses
To edit an address:
- Click the ... on the address card
- Select Edit, update the modal fields, and click Save
To archive an address:
- Click ... > Archive. Archived addresses will be greyed out.
To delete an address:
- Click ... > Delete
- A confirmation modal will ask the user to confirm deletion
- This is permanent and cannot be undone
As with contacts, if the user does not have permission, the ... menu will be greyed out and inactive.
Filtering and display behaviour
Both contacts and addresses follow the same filtering rules:
- The dropdown menu filters by Active, Archived, or All
- When All is selected:
- Active entries are displayed first
- Archived entries are listed below and visually distinct (greyed out)
- Contacts without job titles will display a "-" in the Job Title column
- Archived contacts have obscured phone and email fields (visible only to Agents)
- Archived addresses appear greyed out and show a grey flag
Additional logic and plan limits
- The "Add contact" and "Add address" buttons are hidden if the plan limit is reached
- Clicking will show: "Plan limit reached, upgrade plan"
- Users without permission to manage contacts/addresses will see these buttons greyed out
- If a user has the right to manage but their contract becomes archived, the ability is removed
- The contact and address filtering dropdown currently only filters contacts — this may be updated in future releases